Tcl/Tk 描画
この章では、TclTkの描画について紹介します。TclTkの描画はキャンバスウィジェットで行われます。キャンバスウィジェットは、グラフィックのための高度なウィジェットです。
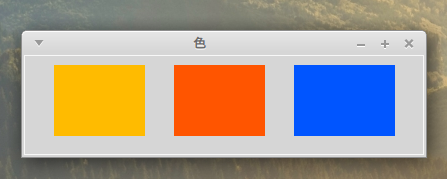
色
TclTkでは、RGB(赤、緑、青)の明るさを組み合わせて色を表します。
color.tcl
oo::class create Example {
    constructor {} {
        my initUI
    }
    method initUI {} {
        wm title . 色
        wm geometry . 400x100+300+300

        canvas .can
        .can create rect    30 10 120 80 -outline #fb0 -fill #fb0
        .can create rect 150 10 240 80 -outline #f50 -fill #f50
        .can create rect 270 10 370 80 -outline #05f -fill #05f
        pack .can -fill x
    }
}

Example create o
コード説明
canvas .can
canvasコマンドでキャンバスウィジェットを作成します。
.can create rect 30 10 120 80 -outline #fb0 -fill #fb0
キャンバス.canに対してcreateコマンドを使ってrect(四角形)を作成します。4つの引数は、x座標、y座標、四角形の横幅、四角形の高さになります。-outlineオプションは四角形の枠の色を設定し、-fillオプションは四角形の内側の色を設定します。形を表す4つの引数は省略できません。-outlineオブションを省略すると枠線は黒になります。-fillオプションを省略すると内側の色は白になります。
pack .can -fill x
packコマンドでキャンバスをウィンドウに配置しています。WindowsやLinuxでは-fillオプションを指定しなくても正常に描画されますが、masOSでは、-fillオプションを指定しないと、一番右側の青い四角形が途中で切れてしまいます。
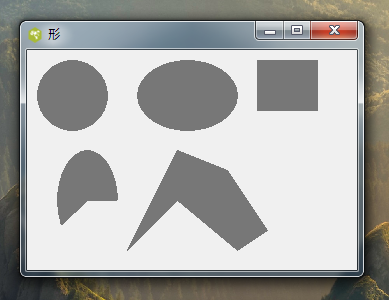
形
キャンバスには様々な形を描くことができます。
shape.tcl
oo::class create Example {
    constructor {} {
        my initUI
    }
    method initUI {} {
        wm title . 形
        wm geometry . 330x220+300+300

        canvas .can
        .can create oval  10  10  80  80 -outline #777 -fill #777
        .can create oval 110  10 210  80 -outline #777 -fill #777
        .can create rect 230  10 290  60 -outline #777 -fill #777
        .can create arc   30 200  90 100 -outline #777 -fill #777 \
                                         -extent  210  -start 0
        set points [list 150 100 200 120 240 180 210 200 150 150 \
                                         100 200]
        .can create polygon $points     -outline #777 -fill #777
        pack .can
    }
}

Example create o
コード説明
.can create oval 10 10 80 80 -outline #777 -fill #777
create ovalで楕円を作成します。楕円の位置やサイズは、楕円がちょうど入る四角形のxy座標と幅と高さを設定します。幅と高さを同じ値にすると正円になります。
.can create arc   30 200  90 100 -outline #777 -fill #777 \
                                         -extent  210  -start 0
create arc で、円弧が作れます。円弧は円周の一部分の事です。-startオプションは円弧の開始点を設定します。3時の方向が0になります。-extentは-startからの反時計回りの角度を設定します。
set points [list 150 100 200 120 240 180 210 200 150 150 \
                                         100 200]
.can create polygon $points     -outline #777 -fill #777
create polygon で多角形を作成します。多角形には各座標のリストを設定します。
pack .can
このサンプルでは、packコマンドにオプションを指定しなくても、正常に表示されるみたいです。
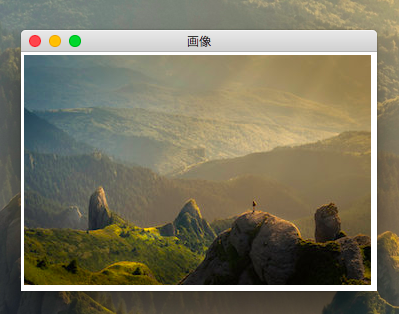
画像
このサンプルでは、キャンバスに画像を表示します。
サンプルで使用する画像はここからダウンロードできます。解凍した img フォルダをコードファイルと同じディレクトリに置いてください。
image.tcl
package require Img

oo::class create Example {
    constructor {} {
        my initUI
    }
    method initUI {} {
        wm title . 画像
        wm geometry . +300+300

        image create photo img -file img/precipice2.jpg
        set height [image height img]
        set width    [image width    img]

        canvas .can -height $height -width $width
        .can create image 0 0 -anchor nw -image img
        pack .can
    }
}

Example create o
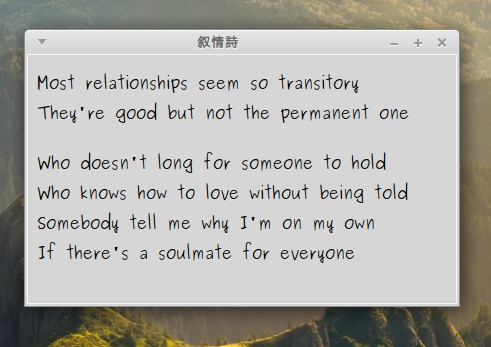
テキスト
この例では、キャンバスにテキストを描画します。
text.tcl
oo::class create Example {
    constructor {} {
        my initUI
    }
    method initUI {} {
        wm title . 叙情詩
        wm geometry . 430x250+300+300

        canvas .can
        .can create text 10 30 -anchor w -font Purisa \
            -text "Most relationships seem so transitory"
        .can create text 10 60 -anchor w -font Purisa \
            -text "They're good but not the permanent one"
        .can create text 10 110 -anchor w -font Purisa \
            -text "Who doesn't long for someone to hold"
        .can create text 10 140 -anchor w -font Purisa \
            -text "Who knows how to love without being told"
        .can create text 10 170 -anchor w -font Purisa \
            -text "Somebody tell me why I'm on my own"
        .can create text 10 200 -anchor w -font Purisa \
            -text "If there's a soulmate for everyone"
        pack .can -fill both -expand 1
    }
}

Example create o
PurisaというフォントはLinuxにしか入っていません。
pack .canで、-fillオプションと、-expandコマンドを指定しないと、テキストがウィンドウに入りきらない場合があります。
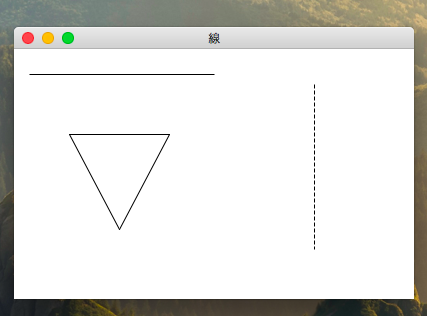
線
この例ではキャンバスに線を引きます。
line.tcl
oo::class create Example {
    constructor {} {
        my initUI
    }
    method initUI {} {
        wm title . 線
        wm geometry . 400x250+300+300

        canvas .can
        .can create line    15 25 200    25
        .can create line 300 35 300 200 -dash {4 2}
        .can create line    55 85 155    85 105 180 55 85
        pack .can -fill x
    }
}

Example create o
コード説明
.can create line 15 25 200 25
create line でキャンバスに線を引きます。第1引数と第2引数は、線の開始位置のx座標とy座標です。同様に、第3引数と第4引数は、線の終了地点のx座標とy座標です。
.can create line 300 35 300 200 -dash {4 2}
dash オプションで、4ピクセルの線と2ピクセルの空白が、交互に現れる破線を設定しています。
.can create line 55 85 155 85 105 180 55 85
create line コマンドは、x座標とy座標を使っていくつでも位置を指定できます。ここでは三角形を描画しています。
pack .can -fill x
macOSの場合、-fill オプションに x を指定しなければ、右側の破線が表示されません。