Tcl/Tk ダイアログ
この章では、ダイアログを紹介します。
メッセージボックス
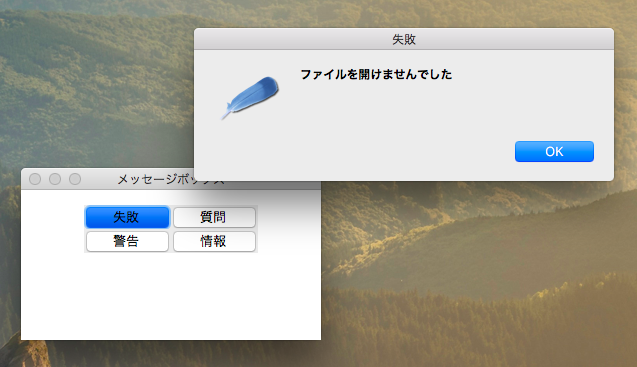
メッセージボックスはユーザーにメッセージを提供するダイアログです。
messagebox.tcl
oo::class create Example {
    constructor {} {
        my initUI
    }
    method initUI {} {
        wm title . メッセージボックス
        wm geometry . 300x150+300+300

        frame .fr
        pack    .fr -pady 15

        ttk::button .fr.errButton -text 失敗 -command {tk_messageBox \
            -type ok -icon error -title 失敗 \
            -message ファイルを開けませんでした }
        grid .fr.errButton

        ttk::button .fr.warButton -text 警告 -command {tk_messageBox \
            -type ok -icon warning -title 警告 \
            -message 非推奨の関数を呼び出しています }
        grid .fr.warButton -row 1 -column 0

        ttk::button .fr.queButton -text 質問 -command {tk_messageBox \
            -type ok -icon question -title 質問 \
            -message 本当に終了してもよろしいですか? }
        grid .fr.queButton -row 0 -column 1

        ttk::button .fr.infButton -text 情報 -command {tk_messageBox \
            -type ok -icon info -title 情報 \
            -message ダウンロードが完了しました }
        grid .fr.infButton -row 1 -column 1
    }
}

Example create o
コード説明
frame .fr

pack    .fr -pady 15
今回は、ウィンドウの中央、上から15ピクセルにグリッドを配置するためにフレームを使用しています。
ttk::button .fr.errButton -text 失敗 -command {tk_messageBox \
ttk::button を作ります。コマンドには、TclTkに用意されているtk_messageBoxを呼び出します。このコマンドはメッセージボックスを作成します。
-type ok -icon error -title 失敗 \
-typeでOKボタンのみが表示されることを指定しています。-iconはエラーを表すアイコンを指定しています。-titleには「失敗」が設定されます。
WindowsとLinuxでは、error、warning、question、infoのそれぞれが違うアイコンになりますが、macOSではwarningだけが違うアイコンになります。
-message ファイルを開けませんでした }
-message に「ファイルを開けませんでした」を設定しています。
grid .fr.errButton
grid コマンドで、-rowと、-columnを省略すると0行目の0列目に配置されます。

カラーチューザー
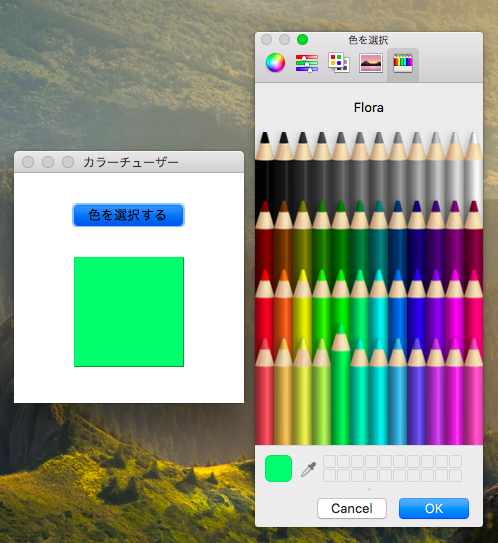
カラーチューザーは色を選択するためのダイアログです。
colorchooser.tcl
oo::class create Example {
    constructor {} {
        my initUI
    }
    method initUI {} {
        wm title . カラーチューザー
        wm geometry . 230x230+300+300

        ttk::button .b -text 色を選択する -command \
            {.fr configure -background \
            [tk_chooseColor -title 色を選択 -parent .] \
            }
        pack .b -pady 30

        frame .fr -relief groove -width 110 -height 110 -bd 1
        pack  .fr
    }
}

Example create o
コード説明
{.fr configure -background \

[tk_chooseColor -title 色を選択 -parent .] \

}
tk_chooseColorで、色選択ダイアログのカラーチューザーを表示します。-parentプロパティはカラーチューザーダイアログが所属するウィンドウを指定しています。ここではルートウィンドウ . を指定しています。そして選択された色を、.frの backbround (背景色)に設定しています。
pack .b -pady 30
ボタンウィジェットをpackコマンドでウィンドウの左右中央に配置します。-padyオプションでボタンの上下に30ピクセルの空白ができます。
frame .fr -relief groove -width 110 -height 110 -bd 1
フレームを幅110ピクセル、高さ110ピクセルで作成します。-reliefオプションでは、groove(わだち?)を指定していますが、実際にはわだちっぽくないです。
pack .fr
フレームに幅と高さを設定して、枠線にレリーフ(浮き彫り)も設定しているので、中身がなくても、ウィンドウに表示されます。

ファイルダイアログ
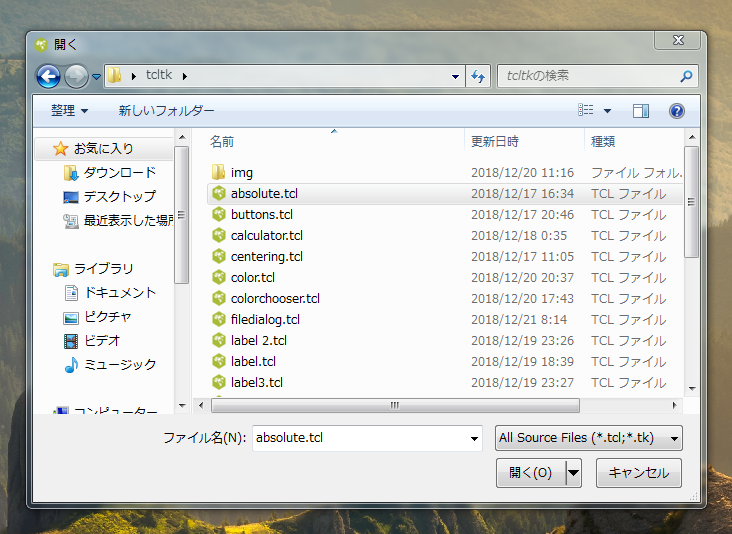
ファイルダイアログは、ファイルを選択することができます。
filedialog.tcl
oo::class create Example {
    variable types
    constructor {} {
        set types {
            {"All Source Files" {.tcl .tk } }
            {"Image Files" {.gif .png .jpg} }
            {"All files" *}
        }
        my initUI
    }
    method initUI {} {
        wm title . オープンファイル
        wm geometry . 400x200+300+300

        ttk::button .b -text ファイルを選択する。
        pack    .b -pady 30

        label .l -text ...
        pack    .l -pady 20
    }
    method onSelect {} {
        set file [tk_getOpenFile -filetypes $types -parent .]
        .l configure -text $file
    }
}

Example create o
bind .b <ButtonRelease> {o onSelect}

テキストビューワー
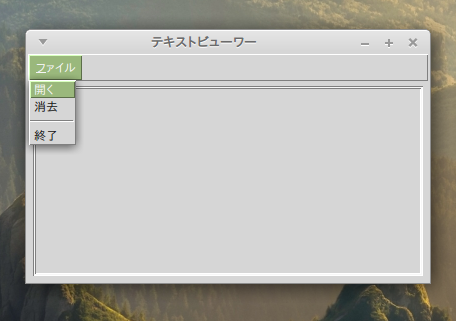
ファイルダイアログの応用例としてテキストビューワーを作ってみました。
textviewer.tcl
oo::class create Example {
    variable types
    constructor {} {
        set types {
            {Tclファイル .tcl}
            {すべてのファイル *}
        }
        my initUI
    }
    method initUI {} {
        wm title . テキストビューワー
        wm geometry . 400x200+300+300

        menu .mbar
        . configure -menu .mbar
        menu .mbar.fl -tearoff 0
        .mbar add cascade -menu .mbar.fl -label ファイル -underline 0
        menu .mbar.fl.op -tearoff 0

        frame .fr -relief sunken -bd 1
        pack .fr -fill both -expand 1 -padx 5 -pady 5
        text .fr.txt;# -background #ccc
        pack .fr.txt -fill both -expand 1
    }
    method onSelect {} {
        set file [tk_getOpenFile -filetypes $types -parent .]
        if {$file!=""} {
            .fr.txt delete 1.0 end
            set f [open $file]
            set linecount 1
            while {[gets $f line] >= 0} {
                .fr.txt insert end $line\n
                incr linecount
            }
            close $f
        }
    }
}

Example create o
.mbar.fl add command -label 開く -command {o onSelect}
.mbar.fl add command -label 消去 -command {.fr.txt delete 1.0 end}
.mbar.fl add separator
.mbar.fl add command -label 終了 -command {exit}
